
This is the first post of a series that aims to explain how to get a fully productive and integrated Linux development environment within Windows 10. Today, I will explain what is WSL 2 and how to install it on Windows.
What is WSL 2?
On Microsoft words:
The Windows Subsystem for Linux (WSL) lets developers run a GNU/Linux environment (including most command-line tools, utilities, and applications such as bash, ssh, sudo, apt, curl, etc.) directly on Windows, unmodified, without the overhead of a traditional virtual machine or the extra disk space needed for a dual boot setup.
WSL 2 is a new version of the Windows Subsystem which primary goals are to increase file system performance, as well as adding full system call compatibility. The Linux kernel is executing in parallel to the Windows one, in a very light hypervisor (a low resource consuming virtual machine).
So in fact, WSL is just a very light Linux virtual machine that is fully integrated with Windows.
If you are interested in learning more about what is WSL and what it does, along with the differences between version 1 and 2, you can check the official Microsoft docs.
Enabling WSL on your Windows
wsl –install and reboot your system. When system boots again, a Linux
shell will open and Ubuntu will be installed. Voilà!First, your Windows 10 build version should be 1903 (also known as 19H1) or above. This is a version from May 2019, so if you have auto updates enables, it is highly probable that you are using a compatible Windows 10 build.
If you want to check what your current Windows 10 build version is, just run winver and a pop-up will show you all info related to your Windows versions.
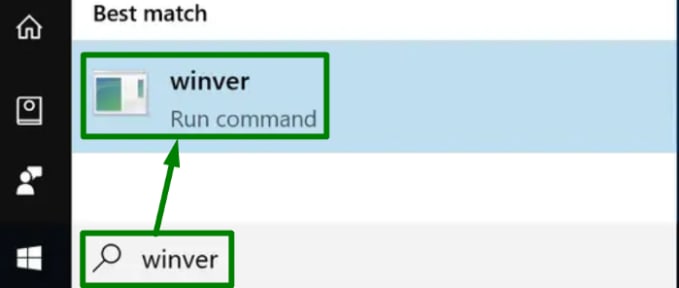
Click on image to enlarge
Next, we will enable the WSL feature on our Windows. For doing that, open a new PowerShell terminal as administrator. Just search in the Windows’ menu for powershell and do right click -> execute as administrator. There, we will execute the following command:
dism.exe /online /enable-feature /featurename:Microsoft-Windows-Subsystem-Linux /all /norestartNow, we must enable the Virtual Machine Platform feature to WSL for proper working, by executing:
dism.exe /online /enable-feature /featurename:VirtualMachinePlatform /all /norestartAt this point we should restart our Windows to apply changes. Once we are back in our user, we need to set WSL version 2 as our default WSL version. For doing that, open a new PowerShell terminal (doesn’t need to be an administrator privileged terminal) and execute the following command:
wsl --set-default-version 2Installing your Linux distribution
Congratulations! You have already installed WSL 2 in your machine. It wasn’t so difficult, wasn’t it? Just a few terminal commands.
The next step is to install your Linux distribution of choice. To do so, just open the Microsoft Store app on your Windows and search for linux.
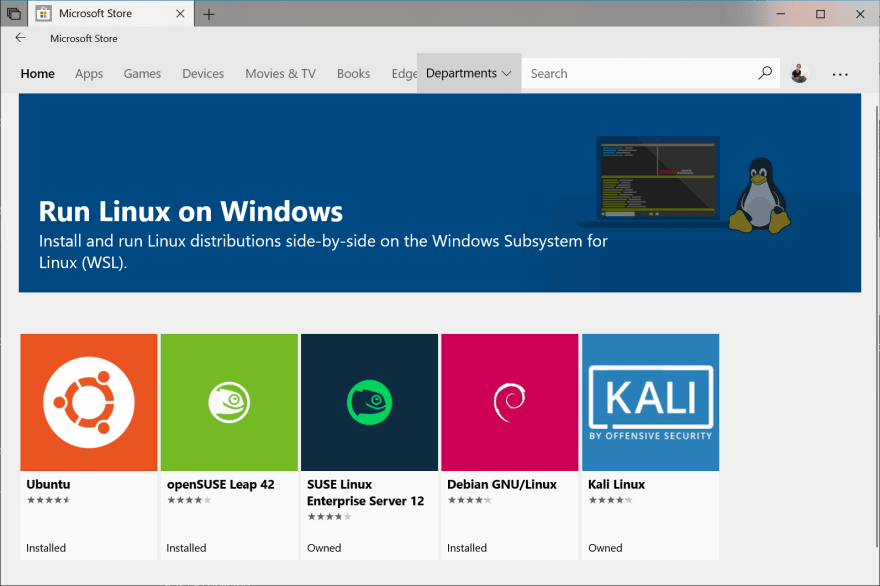
Click on image to enlarge
Personally, I installed Ubuntu for the following subjective reasons:
- Canonical (the developers of Ubuntu) and Microsoft have a partnership to ensure maximum stability and compatibility of the Ubuntu image for WSL.
- Most of Linux users out there use Ubuntu (specially newbies), so it is easy to find resolution to the bast majority of problems, because chances are that someone had the same problem before you.
- As a developer (my Linux geek times went away years ago) I want to expend the less time possible solving problems with my environment, so the above two points are important to me.
However, you can use, as I said, the distro of your choice. I will use Ubuntu for the rest of the series, but the steps should be equal or very similar to all the WSL available Linux distributions. Just chose one and select “Get” on the Store.
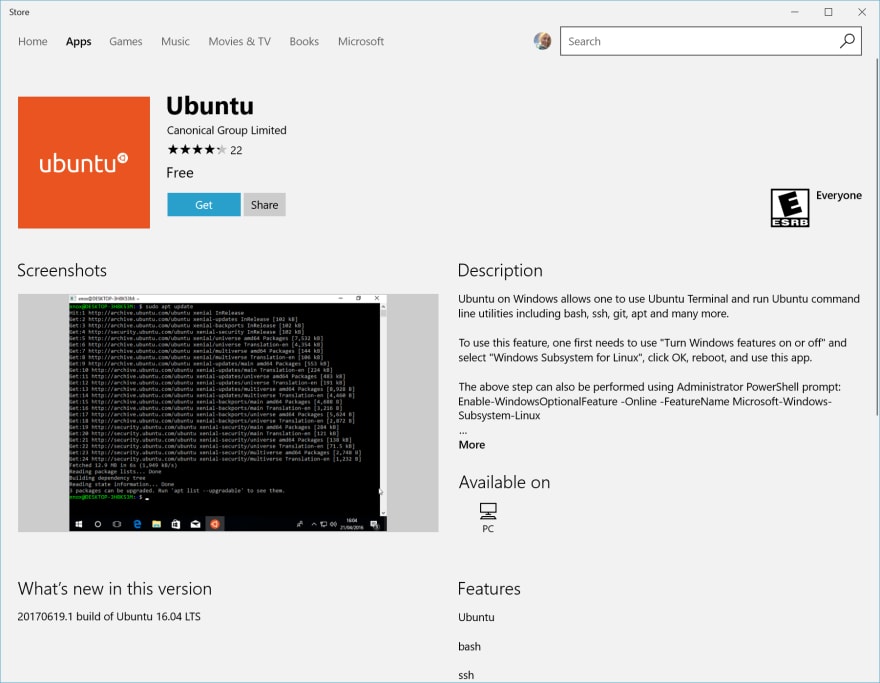
Click on image to enlarge
The first time you launch a newly installed Linux distribution, a console window will open, and you’ll be asked to wait for a minute or two for files to decompress and be stored on your PC. All future launches should take less than a second.
You will then need to create a user account and password for your new Linux distribution. This will be a user with sudo privileges. The onboarding script will guide you through this process, but if you have some doubts or want to know more, here is the official Microsoft docs that explain it in details.
Hope you have found this post useful. Check the rest of related articles to get the full potential of WSL!