Free privacy friendly analytics for your website with Umami on Vercel and Supabase

Updated
6 min read
RSS feedUmami, as they explain in their web, is an open source, privacy-focused alternative to Google Analytics. I have been using it for nearly three years now as my only analytics tool for my website, and I am very happy with it. It can be self-hosted wherever you want, but I will explain how to use it with Vercel and Supabase, as this is how I deployed it and can safely support a few thousands visits/day site like this for free. If you are interested in other hosting alternatives you can check their docs.
Why vercel and Supabase? What other alternatives are there?
Both, Vercel and Supabase, are provider with generous free tiers, and easy to use. Setting Umami with them can easily be done in a few minutes, and the free tier will be enough for low to middle traffic websites, before you need to move to another service or start paying for it.
You can self-hosting it anywhere. They provide official docker images. and it’s open-source, so you could even deploy it on AWS or your home server. Also, they support lot of third party service others than Vercel or Supabase. However, I have tested some of them and I found that only Vercel and Supabase can handle the traffic that I generate for free.
They mainly publicite Railway as hosting provider, and honestly it’s a good and easy to use service, but it requires to pay for a developer plan if you want to run your analytics 24/7 with some middle traffic. The umami team is also heavily working on provide a managed hosted version of Umami called Umami Cloud, but it’s not ready yet but in beta.
Let’s do it! First: setting up the database
Umami needs a database to where store analytics data. We’ll set the database inside Supabase, which is an open source alternative to Firebase that provides a provisioned PostgreSQL database. First, let’s sign in into Supabase and create a new project by clicking in the ‘New project’ button.

Click on image to enlarge
Then, fill the details of your project: the project name, the database password, and where it will be located. I suggest you to choose a location near yours to reduce latency, as you will be the person using the database the most. I also suggest you to use a strong password for security reasons.
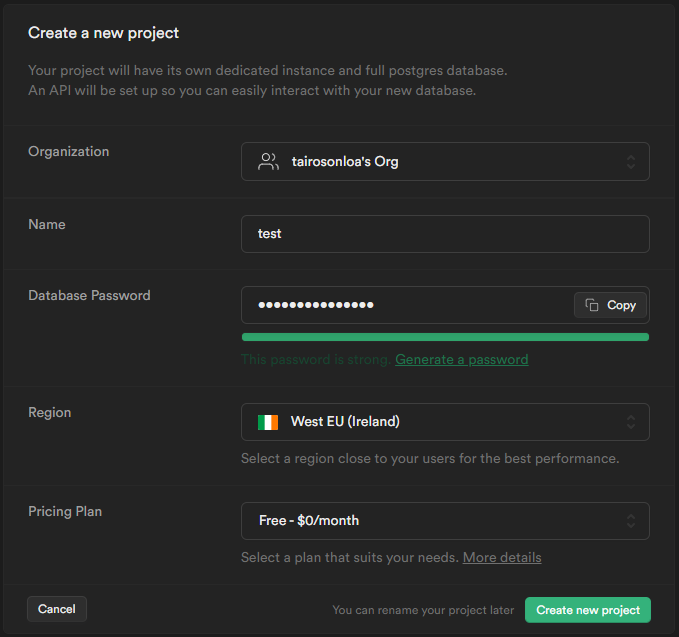
Click on image to enlarge
And that’s it. You don’t need to do anything more in Supabase. However, you can take a look at the different options and tools they provide in the administration panel of the newly created project. You can see your data later on under the database tab in the side menu. Also, you can connect to your database with any PostgreSQL client, like psql or DBeaver. You can check the connection information in the settings tab of the project. Also, locate the connection string, as we’ll need it next.
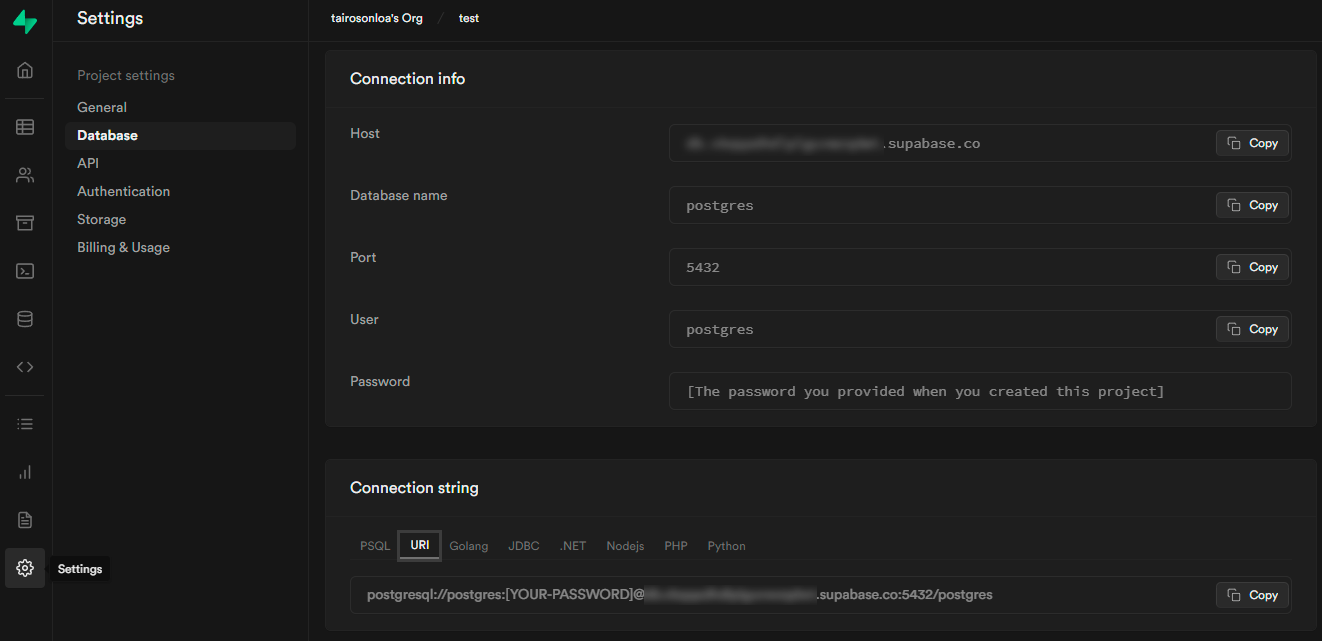
Click on image to enlarge
Database ready! Second: setting up Umami on Vercel
Now, we will deploy Umami on Vercel. You need to complete the following steps, or automate them by clicking on the ‘Deploy’ button.
- Fork the https://github.com/umami-software/umami project to your GitHub account.
- Create an account on Vercel, if you already haven’t one.
- From the dashboard page, on the ‘Overview’ tab, click ‘Add new…’ then ‘Project’, and connect it to the forked repo.
- Add the
DATABASE_URLenv variable. Here, we need to put the connection string we get at the end of the previous section. - Click ‘Deploy’ and open it on the URL provided by Vercel. You can add a custom domain later on if you want.
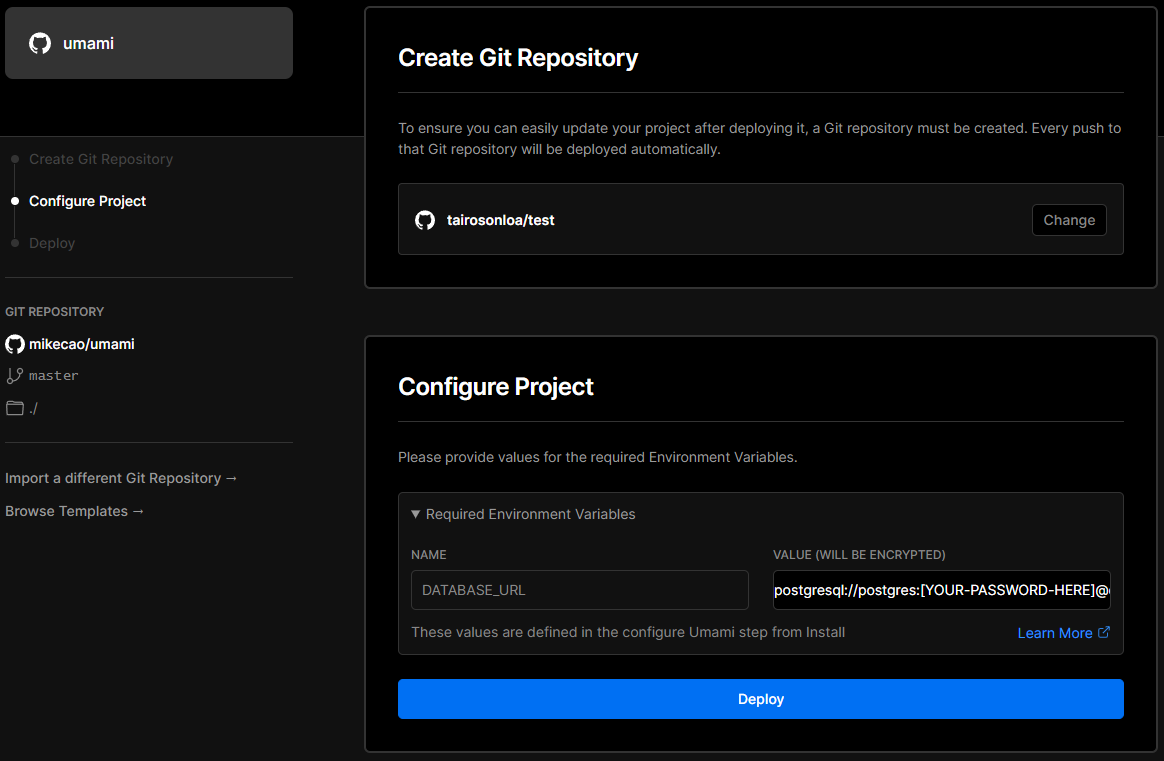
Click on image to enlarge
The build process that runs when Umami deploys will check that the database connection is ok and will generate all the tables for you. If there were any error, you can check the logs from the build steps and try to address them or check for support in the Umami repo
Final steps: configuring Umami and linking our website
Now that Umami is deployed, we need to configure it, and also configure our website to send statistics to the new deployed umami.
The first thing we need to do here is to change the default user and password for Umami. The first time it deploys, an admin user is created with password umami. Log in with those credentials and change the password by navigating to Settings > Profile > Change password.

Click on image to enlarge
Then, will connect our website to umami. Now, in Umami, we need to go to Settings > Websites and add a new website. Here, we need to provide a name for the website and put its URL. You can choose to enable the analytics to be publicly accesible by checking the ‘Enable share URL’ checkbox. This way, everyone with the URL can read-only your statistics. If you don’t want to enable this, you can leave it unchecked.
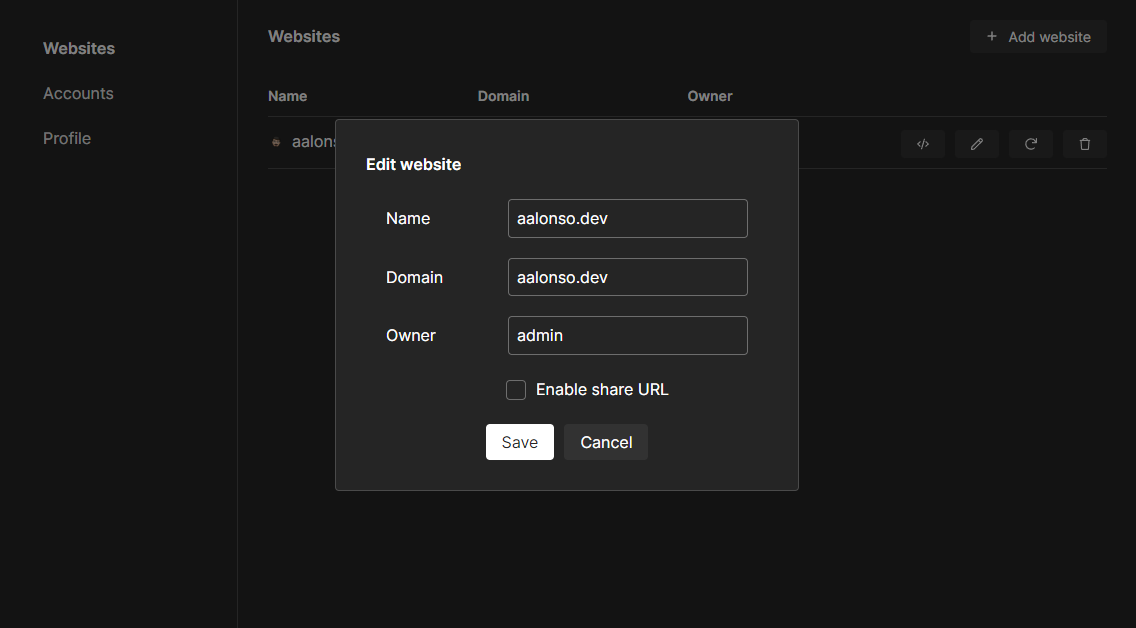
Click on image to enlarge
Now, we have added our website to Umami, but we haven’t connected it yet. The final step is to connect it so it starts sending metrics and visit statistics to Umami. For that, we first need the tracking code that we to set in our website. We can get it from the website we just added, by clicking on the link icon button.
Click on image to enlarge
Copy it to your clipboard and paste inside your website <head> tag of your HTML. If your webisite is made with Next.js like mine, you can add it to the _document.{jsx|tsx} file, and then it will be added to all the pages of your website. Deploy the updated version of your website (with the added tracking script) and you are done!
Now, every page visit to your site will be recorded by umami. You can do some tests if you want. Also, you can configure Umami to do not track your own visits with the IGNORE_IP env variable, or to also track some events like a button click. There are a lot of things you can configure on umami, so I recommend you to read the documentation entirely.
That’s all for today. I hope your website goes well!