If you, like me, interact with AWS a lot via the CLI, you are probably getting tired of the CLI continuously asking you for your credentials or the OTPs generated by your MFA device. I use 1password to manage all my credentials, and although they provide a shortcut to retrieve credentials if you have the desktop app installed (Cmd+Shift+Space on my Mac), it is still a bit cumbersome to continuously searching for the OTPs.
As an engineer and developer, I like to automate things as much as possible. So I was happy when a coworker told me that the 1password CLI could be used to retrieve AWS credentials. This way, I can use my 1password vault to manage all my credentials, and the CLI to retrieve the temporary credentials when I need them.
This guide explains how to integrate the 1password CLI with the AWS CLI to retrieve your AWS credentials from 1password, including the MFA token, automatically for you. You’ll only need to authorize the operation when prompted, which usually will just require your fingerprint on your computer fingerprint reader, reducing a lot the manual work.
Before you start
Before you configure your local environment, ensure:
- You have a valid AWS account.
- You have installed the 1password CLI.
- You have installed the AWS CLI.
Version 2.0 or higher is required. You can check your AWS CLI version by running:
aws --version
Configure main AWS credential retrieval from 1password
First, let’s see how to work normally with AWS CLI without having to store your credentials in your computer.
First, create a new item in 1password with the following fields:
- AWS access key.
- AWS secret access key.
You can use the same item to store your AWS user/password and also the MFA generator (OTP codes). Make sure the name of the item is something unique on your 1password items, and it’s easy to remember (something like aws credentials [email protected] is just perfect).

Click on image to enlarge
Check that you can access your AWS account element from the command line:
# Replace <Your 1password item> with the name of the item you created in the previous step
op item get '<Your 1password item>' --format json | jq '.fields[]|.label'
Following the previous example, the command should be:
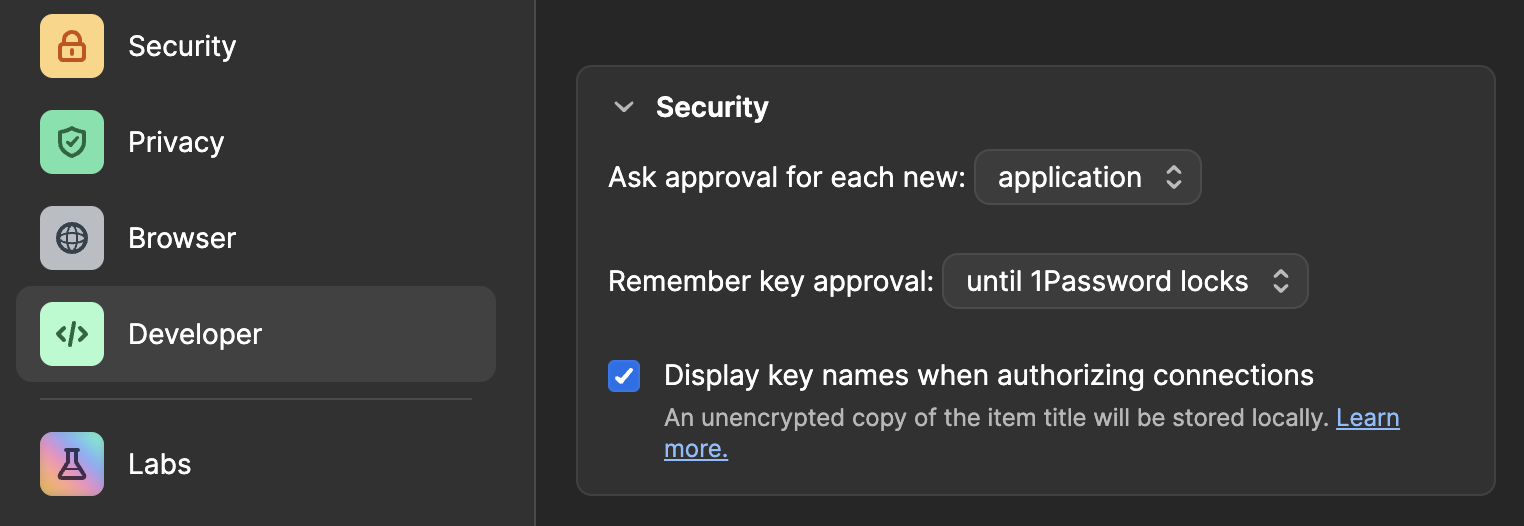
op item get 'aws credentials [email protected]' --format json | jq '.fields[]|.label'1Password will ask you for permission to check your 1password account. You can configure the amount of time you want to be asked for permission on the “developer settings” section of the 1password app.

Click on image to enlarge
Check the command output. It will enumerate the different fields the 1password entry has. It should be like this (it depends on your item layout).
"username"
"password"
"notesPlain"
"one-time password"
"access key"
"secret access key"
Let’s try to obtain the json snippet needed by aws-cli:
op item get '<1password item name>' --format json --fields 'label=access key','label=secret access key' | jq '{ "Version" : 1, "AccessKeyId": "\(.[] | select(.label=="access key") | .value )", "SecretAccessKey": "\(.[] | select(.label=="secret access key") | .value )"}'The output should be something like this:
{
  "Version": 1,
  "AccessKeyId": "XXXXXXXXXXXXXXXXXXXX",
  "SecretAccessKey": "XXXXXXXXXXXXXXXXXXXXXXXXXXXXXXXXXXXXXXXX"
}
Now, edit your ~/.aws/credentials file and add the following lines:
[1password]
credential_process = sh -c "op item get '<1password item name>' --format json --fields 'label=access key','label=secret access key' | jq '{ \"Version\" : 1, \"AccessKeyId\": \"\\(.[] | select(.label==\"access key\") | .value )\", \"SecretAccessKey\": \"\\(.[] | select(.label==\"secret access key\") | .value )\"}'"
Make sure you replace <1password item name> with the name of the item you created in the previous step. Also, make sure you comment or remove the aws_access_key_id and aws_secret_access_key lines from your ~/.aws/credentials file. Also, you must take care of using the correct fields in your 1password item. In my example, I have the access key and secret access key in the fields access key and secret access key.
Check you can access your AWS account element from the command line:
aws sts get-caller-identity --profile 1passwordthe output should be something like this:
{
  "UserId": "xxxxxxxxxxxxxxxxxxxx",
  "Account": "xxxxxxxxxxxx",
  "Arn": "arn:aws:iam::xxxxxxxxxxxx:john/[email protected]"
}
Configure MFA retrieval from 1password
Now, let’s configure AWS CLI to retrieve the OTP for 2FA from 1password. Other tools such as kubectl use AWS CLI under the hood, so this will also configure your MFA retrieval for other tools (like the already mentioned kubectl if you work with kubernetes).
Additionally, the plugin we are going to install will allow you to use two new commands: open-console and set-env that helps a lot to manage your AWS access.
First, check your ~/.aws/config file. You should have something like this:
[default]
region = us-east-1 # Or your default region
output = json

[profile 1password]
region = us-east-1 # Or your default region
output = json

[profile example-profile]
role_arn= # ...
source_profile=1password
mfa_serial = # ...
region = us-east-1 # Or your default region
Test you have access to that profile:
aws sts get-caller-identity --profile example-profileThe output should be something like this:
{
  "UserId": "xxxxxxxxxxxxxxxxxxxx",
  "Account": "xxxxxxxxxxxx",
  "Arn": "arn:aws:sts::xxxxxxxx:assumed-role/IAM_ROLE_NAME/xxxxxxxx"
}
Now, clone the awscli-plugin-op repository from my coworker. In my case, I cloned it directly inside a new plugins/ folder inside ~/.aws/:
cd ~/.aws
mkdir plugins
cd plugins
git clone https://github.com/srlobo/awscli-plugin-op.git
The result directory structure should be like this:
~/.aws/
 |-- plugins/
 |    |-- awscli-plugin-op/
 |    |   |-- README.md
 |    |   |-- awscli_plugin_op/
 |    |   |   |-- *.py
Then, configure the plugin:
- Add the following lines to the end of your
~/.aws/configfile:
[plugins]
op_totp = awscli_plugin_op
# Replace with the absolute path to the cloned repo
cli_legacy_plugin_path = /Users/john.doe/.aws/plugins/awscli-plugin-op- Also, in the same file, add the
op_identityproperty on each profile you want to use the plugin with (usually you want to use it on all the profiles):
op_identity = <your 1password item name>
# Without quotes. Following the previous example:
# op_identity = aws credentials [email protected]
Your ~/.aws/config file should look like this:
[default]
region = us-east-1
output = json

[profile 1password]
region = us-east-1
output = json
op_identity = <your 1password item name>

[profile example-profile]
role_arn= # ...
source_profile=1password
mfa_serial = # ...
region = us-east-1
op_identity = <your 1password item name>

[plugins]
op_totp = awscli_plugin_op
cli_legacy_plugin_path = /Users/john.doe/.aws/plugins/awscli-plugin-op
With the [plugins] section, you are telling the AWS CLI to use the plugin. Then, each op_identity attribute is telling the plugin what 1password item hold the MFA data. Note the op_identity field is literal, don’t put quotes around it.
Finally, test the new configuration:
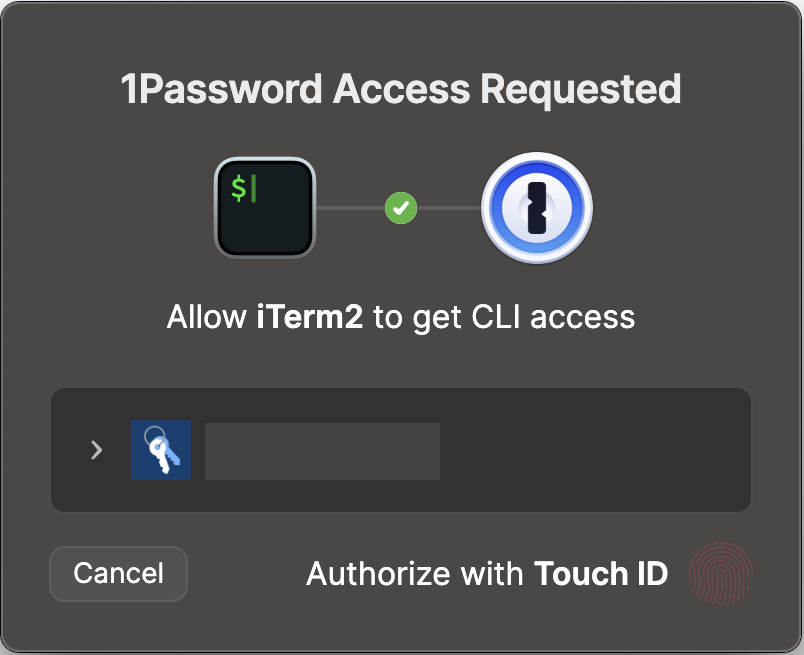
aws sts get-caller-identity --profile example-profileIf you have configured the plugin correctly, the system will ask you for the 1password password or just for the biometric authentication.

Click on image to enlarge
The output should be something like this:
{
  "userid": "xxxxxxxxxxxxxxxxxxxx",
  "account": "xxxxxxxxxxxx",
  "Arn": "arn:aws:sts::xxxxxxxx:assumed-role/IAM_ROLE_NAME/xxxxxxxx"
}
Congratulations! You have successfully configured your AWS CLI to retrieve your credentials from 1password!

