How to install Debian on ProxmoxVE with LUKS encrypted root partition that auto-unlocks on boot

5 min read
RSS feedAt the beginning of the year, I wrote a similar article on how to achieve this on a regular PC using TPM 2.0, while installing Manjaro (ArchLinux based) on my main desktop. However, what about a VM? When hardware is virtualized, things are a bit different. In this article, I’ll show you what you need to create a Debian VM in ProxmoxVE, with the root partition encrypted with LUKS that automatically unlocks and mounts at boot. Let’s dig in!
Configuring ProxmoxVE
First, we need to provide the virtualized hardware to make this auto-unlock and auto-mount thing to work. For that, like in my previous article, we’ll leave it to TPM 2.0. We can emulate a TPM device with Proxmox. For that, when creating the VM, under the “System” tab, we need to configure two important settings.
- We must define
OVMF (UEFI)as the BIOS. This is because TPM will only work with UEFI BIOS. - We must obviously enable TPM, in its 2.0 version, by checking the
Add TPMcheckbox and indicating the correct version.

Click on image to enlarge
You can configure where to store the EFI and the TPM. For the sake of this tutorial, I kept things simple and selected the default local-lvm storage on my ProxmoxVE installation.
An additional change from default you might notice: I’m using q35 as the Machine setting, instead of the default i440fx. This is because q35 is modern, has better PCIe support, and works great with Debian. i440fx is there for legacy hardware or legacy device emulation, which is not what I need. It will work anyway, but it’s always better to use the modern and well-supported option if you don’t have an specific reason to stick with the legacy options.
Also, enabling Qemu Agent allows for better communication between the host and the virtualized machine.
Installing Debian
Installing Debian is straight-forward nowadays. After booting up the installation ISO, I choose the default CLI install (plain Install option) just because I’m more familiarized with it and feels quicker to me, but the same can be achieved with the GUI too.
Go to the usual language and locale settings, host, users creation, etc., until you reach the Partition disks step. Here, we’ll select Guided - use entire disk and set up encrypted LVM.
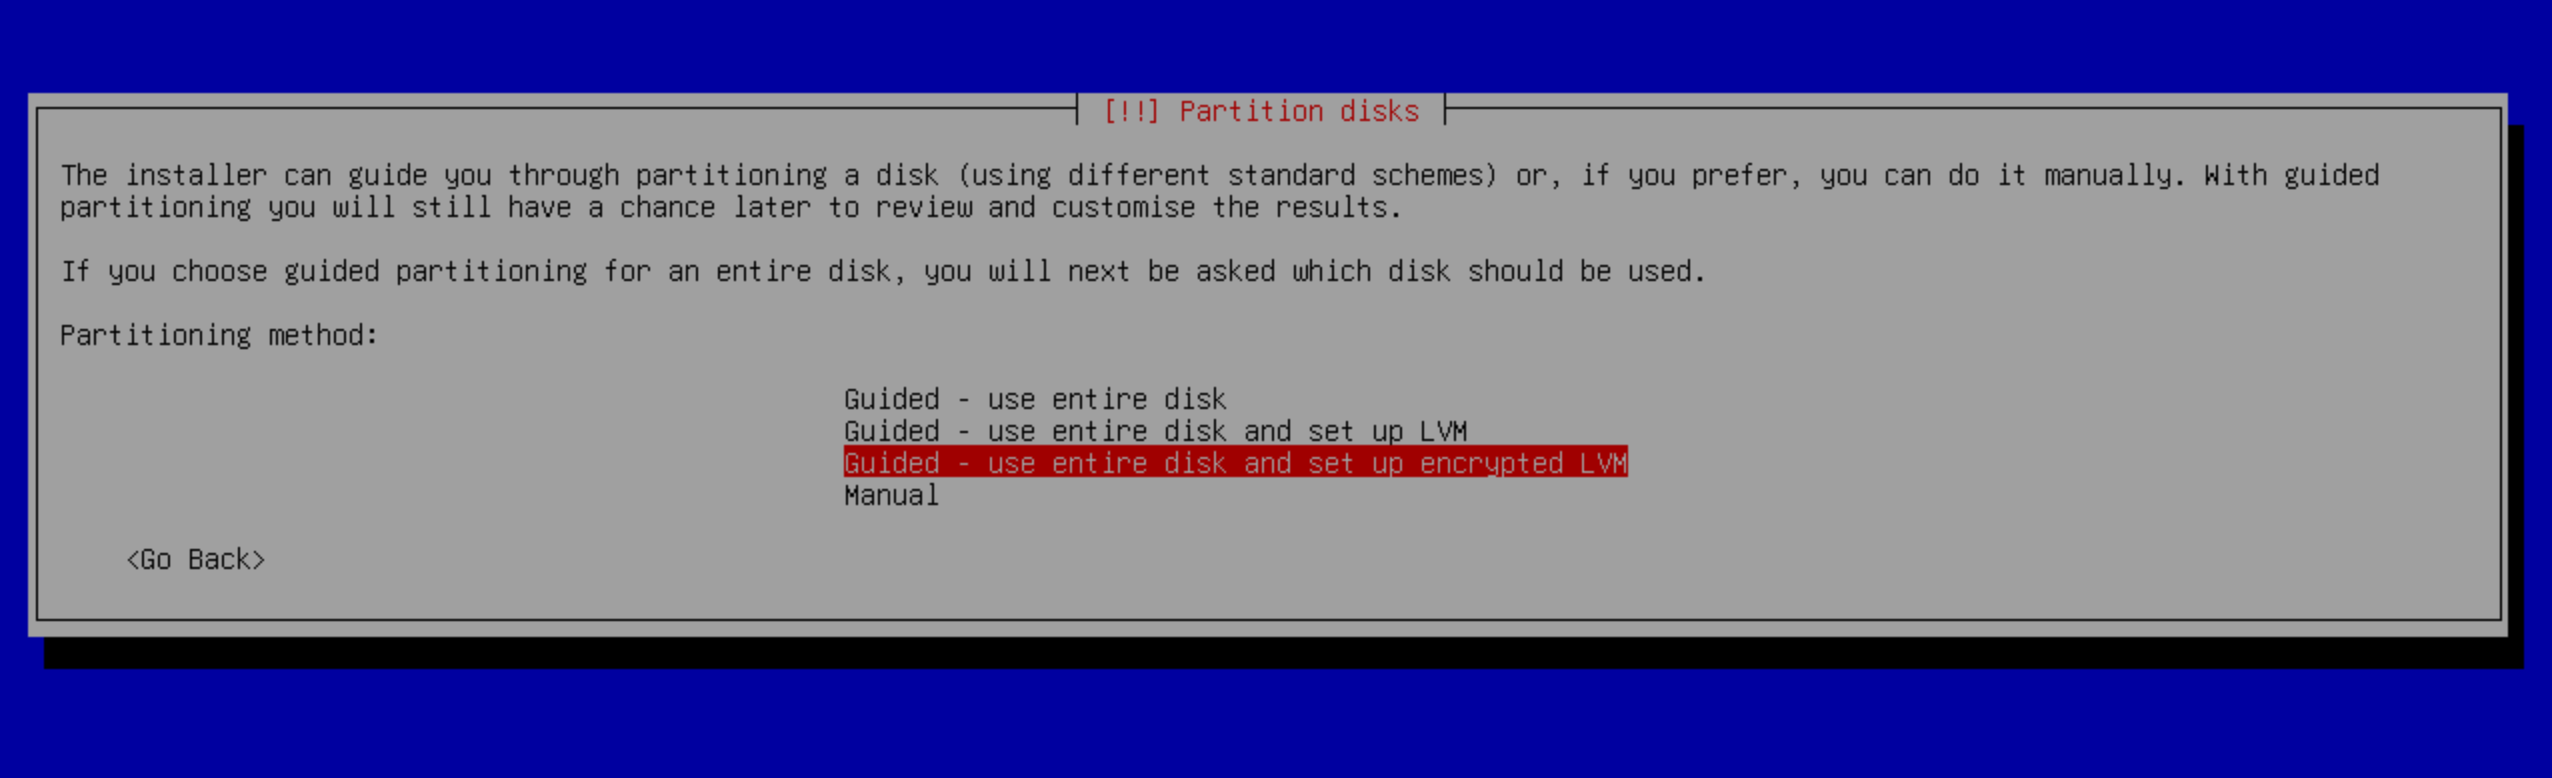
Click on image to enlarge
If asked for a partition scheme, I recommend you to either select All files in one partition or Separate /home partition, but do not separate /var and /tmp or you will suffer from low disk space problems, specially if using docker later. I chose All files in one partition.
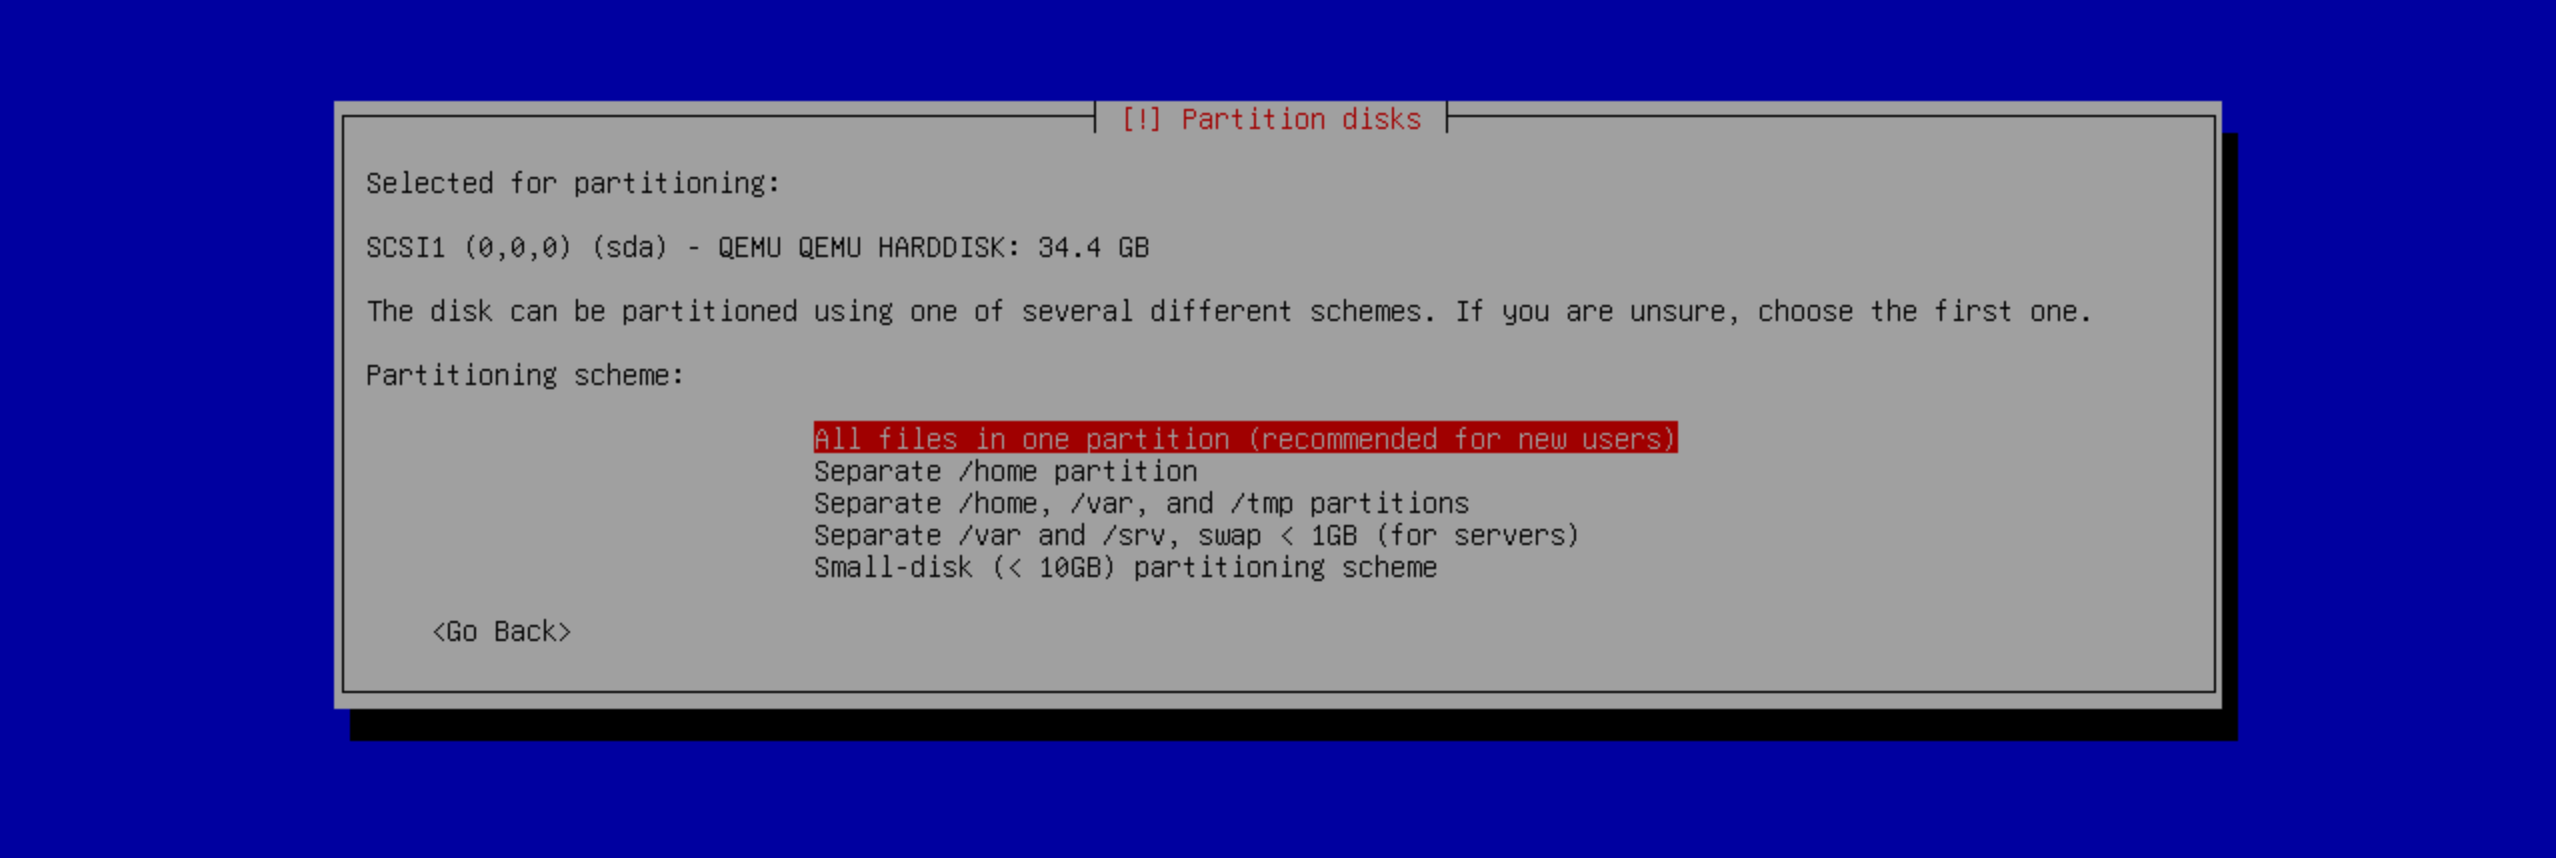
Click on image to enlarge
Then, provide the encryption passphrase. This is the passphrase used to encrypt the data on your root partition. It’s (it should be) different from your root and user passwords, and it’ll be later stored in the TPM for the auto-unlock and auto-mount to work. In the next step, accept the proposed partition scheme and continue by writing changes to disk. Note that the installer generated separated /boot and /boot/efi partitions, needed for auto-unlock feature to work as explained on my previous article.
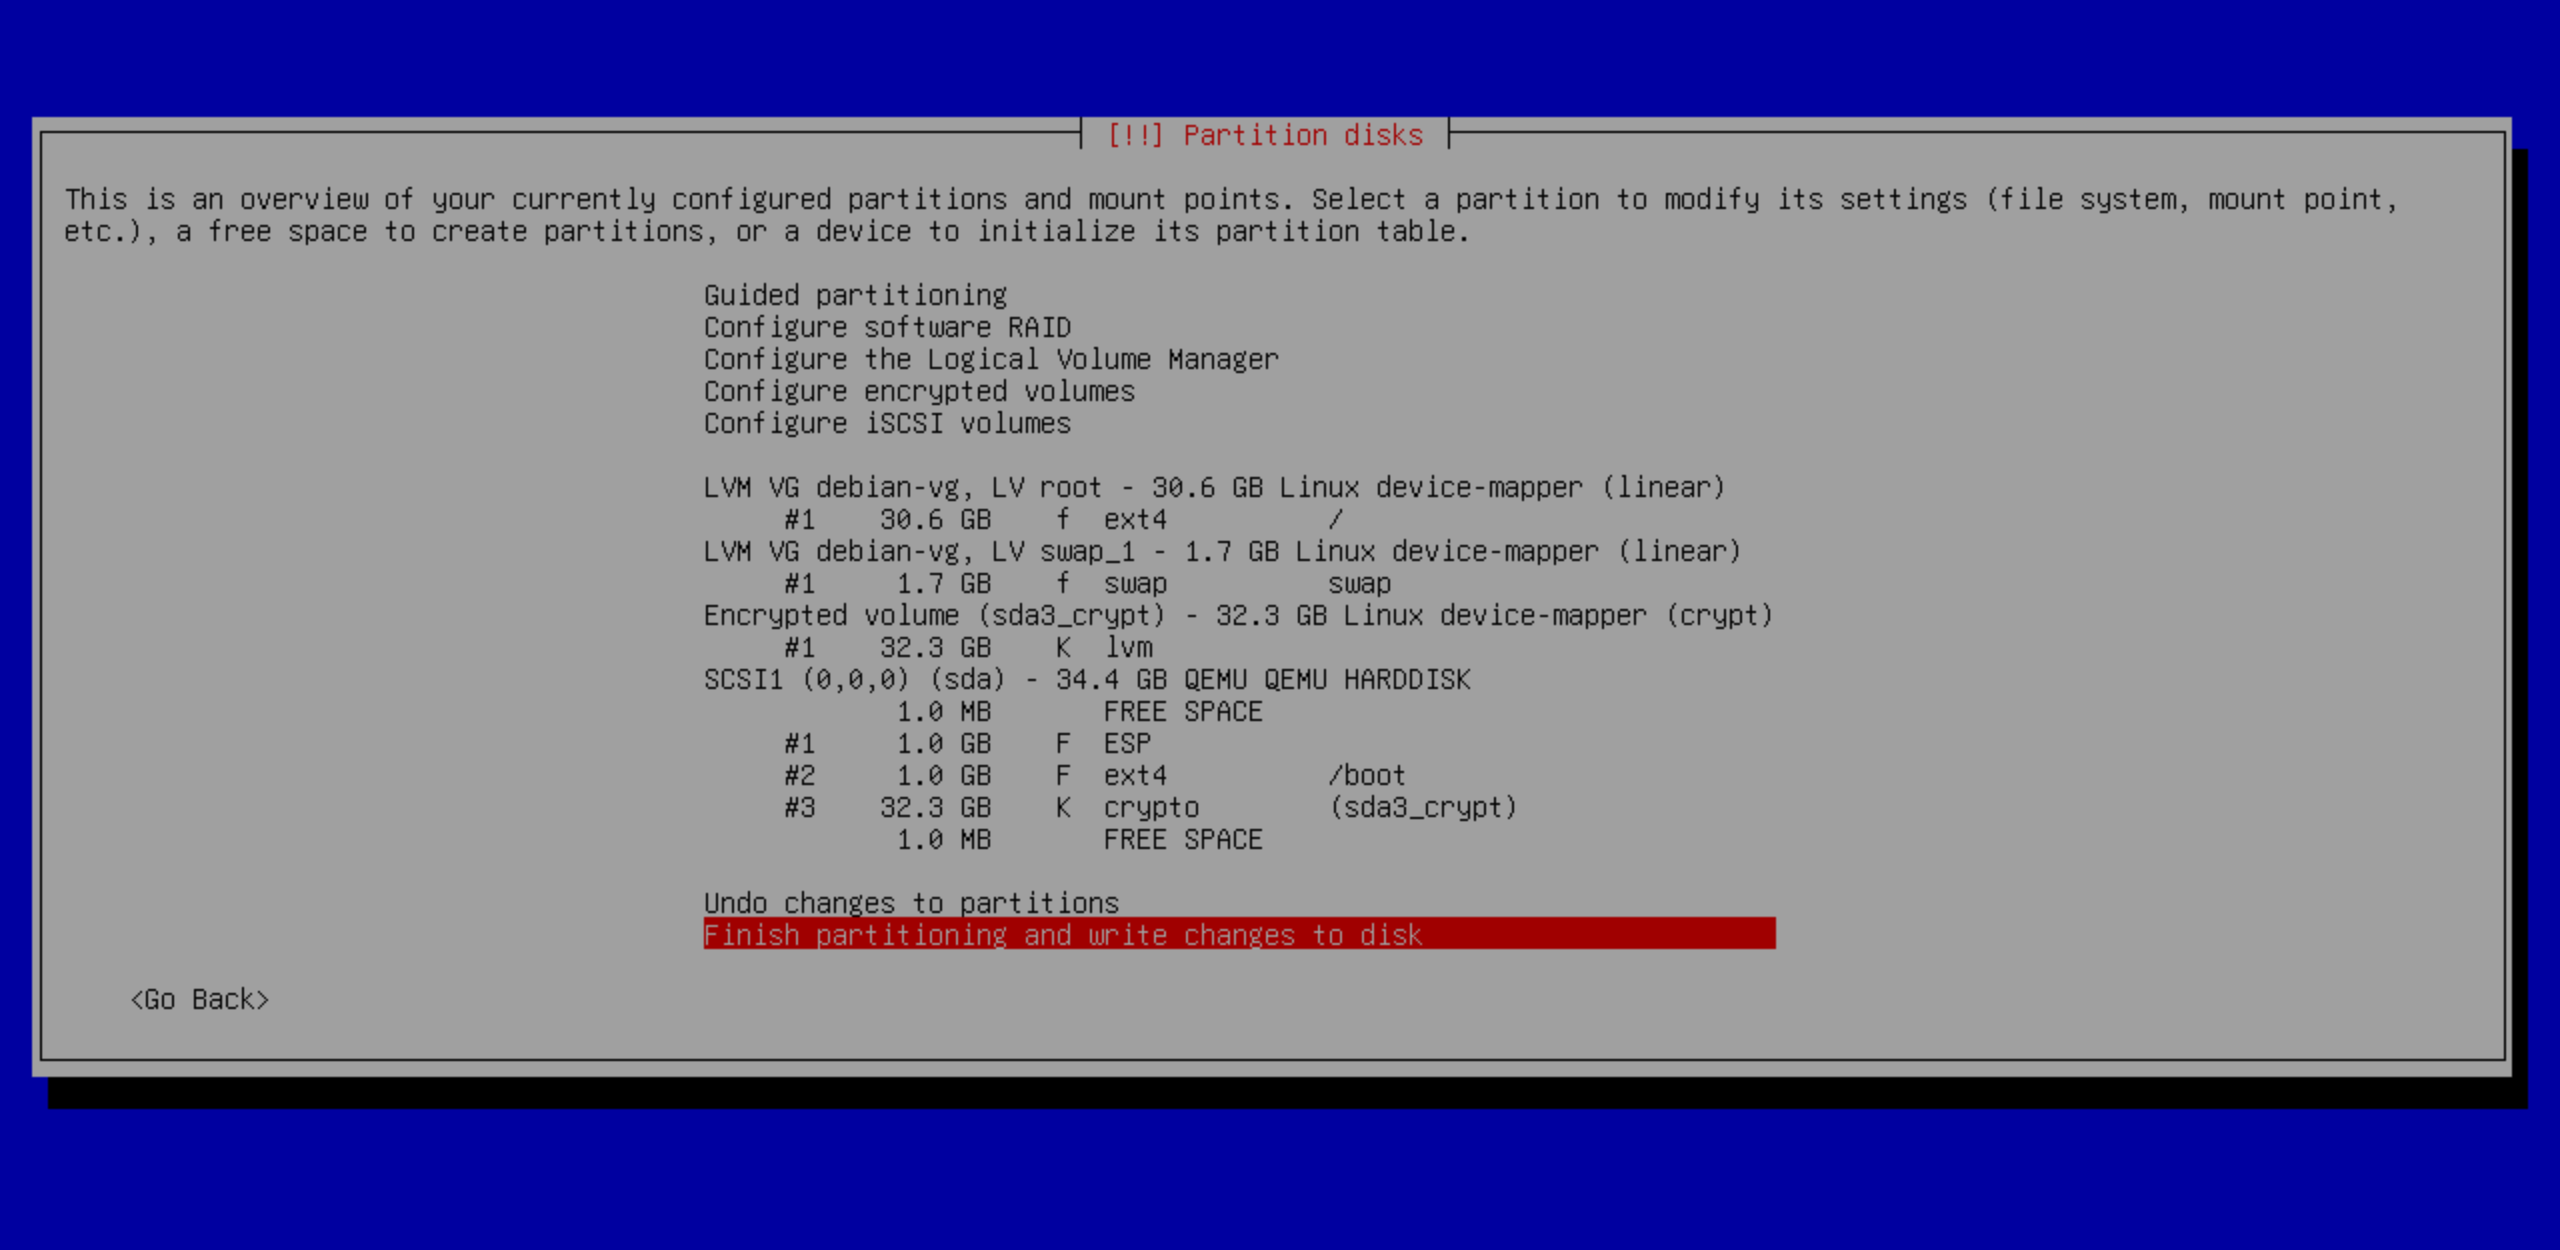
Click on image to enlarge
Next, Debian will start installing. I’m using a net-install ISO, so it will fetch all updated packages from the network and I’ll get an up-to-date system after installation. From here, let’s just wait for the installation to finish and then reboot the VM.
Enabling auto-unlock and auto-mount of root partition
Now that Debian is installed, once the VM reboots, it will load GRUB and start loading Debian. However, due to the disk being LUKS encrypted, we need to manually unlock it this time. Once we configure everything, it will automatically unlock on next restarts.
So open the VM directly from Proxmox web GUI, to land on the VNC interface that allows us to interact with the VM like a regular PC. You will see a prompt asking for the disk encryption passphrase. Something like: Please unlock disk sda3_crypt:. Introduce the passphrase to allow the VM continue booting.
Once the VM fully booted, it’s time to configure the auto-unlock. Log in as root from the VNC, or access via SSH if you enabled it during Debian installation. Then, we’ll install the required packages:
apt install clevis clevis-luks clevis-tpm2 tpm2-tools clevis-initramfsNow, let’s find our encrypted root partition and configured it to automatically unlock on boot. First, let’s search for it with lsblk:
root@debian:~# lsblk -o NAME,SIZE,FSTYPE,MOUNTPOINT
NAME                     SIZE FSTYPE      MOUNTPOINT
sda                       32G
├─sda1                   976M vfat        /boot/efi
├─sda2                   977M ext4        /boot
└─sda3                  30.1G crypto_LUKS
  └─sda3_crypt          30.1G LVM2_member
    ├─debian--vg-root   28.5G ext4        /
    └─debian--vg-swap_1  1.6G swap        [SWAP]
sr0                      754M iso9660
In my case, I can see that sda3 is the encrypted root partition, as it contains the crypto_LUKS tag. So let’s configure it to auto-unlock with clevis. For that run:
clevis luks bind -d /dev/sda3 tpm2 '{"pcr_bank":"sha256","pcr_ids":"7"}'A quick explanation on the options I used:
"pcr_ids":"7"means we want to use PCR ID 7. It will seal the LUKS key against the UEFI settings and the Secure Boot policy using the TPM 2.0 chip. So if the UEFI or Secure Boot settings are modified, the TPM will compute different PCR values and decryption will fail. This gives protection against evil maid attacks."pcr_bank":"sha256"means to use SHA256 as the algorithm to be used for the PCR bank. If not specified, it defaults to SHA1, which is less secure, and in my particular case for my Proxmox VE and host hardware, it’s unsupported, so I would get an error if I don’t specify it.
So execute the clevis command, and when prompted for existing LUKS password, introduce the disk encryption passphrase. And that’s it. Now, you can reboot your VM and it will automatically unlock the root partition and boot normally. I hope it helps!